
Vai zinājāt, ka vairāk nekā 4 miljoni uzņēmumu visā pasaulē izmanto Shopify? Ja vēlaties izveidot savu Shopify interneta veikalu no nulles, platforma piedāvā vienkāršu un pieejamu risinājumu — pat bez iepriekšējas kodēšanas pieredzes. Šajā soli pa solim ceļvedī uzzināsiet, kā izveidot, optimizēt un palaist Shopify veikalu, kas izceļas starp konkurentiem, piesaista klientus un kļūst par veiksmīgu tiešsaistes biznesu.
Kāpēc izveidot veikalu Shopify?
Shopify ir viena no populārākajām e-komercijas platformām, kas piedāvā visus nepieciešamos rīkus interneta veikala izveidei, sākot no vienkāršas platformas lietošanai līdz integrētām maksājumu metodēm un spēcīgām funkcijām. Lūk, dažas no galvenajām priekšrocībām:
-
Nav nepieciešama kodēšana – Shopify ļauj ikvienam izveidot pilnībā funkcionējošu veikalu bez tehniskām zināšanām.
-
Pielāgojami motīvi — izvēlieties kādu no Shopify tēmām un pielāgojiet tās atbilstoši jūsu zīmola identitātei.
-
Plašas maksājumu iespējas — pieņem maksājumus, izmantojot MakeCommerce maksājumu moduli, PayPal, Stripe un citus pakalpojumus.
-
Izaugsmes iespējas — paplašiniet savu veikalu, izmantojot Shopify platformu, kas piedāvā elastīgus plānus un jaudīgas integrācijas, kas aug līdzi jūsu biznesam.
-
24/7 klientu atbalsts — saņemiet palīdzību no Shopify ekspertiem jebkurā laikā.
Tagad sāksim ar Shopify veikala izveidi soli pa solim.
1. solis: Izveidojiet Shopify kontu
-
Izveidojiet kontu Shopify mājaslapā un noklikšķiniet uz Bezmaksas izmēģinājums.
-
Ievadiet savu e-pasta adresi, izveidojiet paroli un izvēlieties veikala nosaukumu, kas atspoguļo jūsu zīmolu.
-
Atbildiet uz dažiem pamata jautājumiem par savu biznesu, lai iegūtu vislabāko pieredzi.
-
Noklikšķiniet uz Tālāk, lai piekļūtu savam Shopify Admin Dashboard.
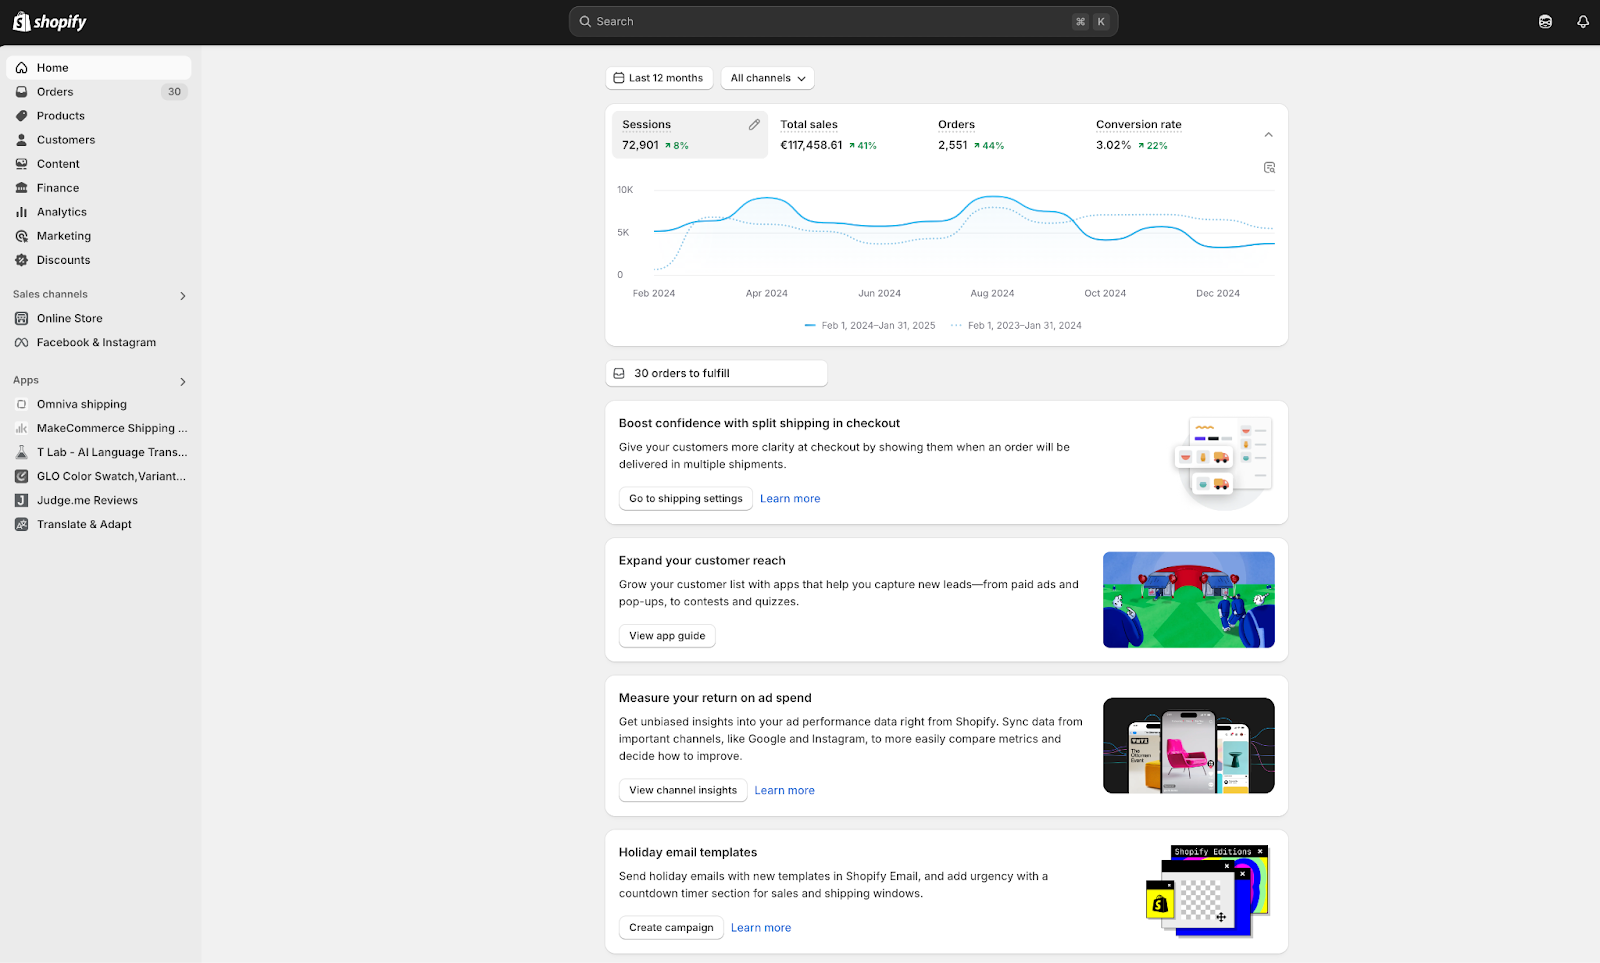
2. solis: Iepazīstieties ar administratora paneli
Shopify administratora panelis ir jūsu veikala pārvaldības centrs, kur ērti varat pārvaldīt visus svarīgākos veikala aspektus:
-
Pasūtījumi – pārvaldiet pasūtījumus un to izpildi vienuviet.
-
Produkti — pievienojiet, rediģējiet, organizējiet savu produktu katalogu.
-
Klienti – apskatiet klientu datus un pirkumu vēsturi.
-
Analītika — sekojiet līdzi veikala veiktspējai un SEO optimizācijai.
-
Mārketings — izveidojiet reklāmas kampaņas un automatizējiet e-pasta mārketingu.
-
Lietotnes — paplašiniet veikala iespējas ar uzticamām trešo pušu lietotnēm no Shopify App Store.
3. solis: Izvēlieties un pielāgojiet savu Shopify motīvu
Veikala dizains ir viens no svarīgākajiem elementiem klientu piesaistē un noturēšanā.
-
Izvēlieties Shopify tēmas no Shopify motīvu veikala. Dodieties uz Tiešsaistes veikals > Motīvi.
-
Atradiet ideālo dizainu savam veikalam — no bezmaksas līdz premium motīviem Shopify motīvu veikalā.
-
Noklikšķiniet uz Pielāgot, lai pielāgotu krāsas, fontus, izkārtojumus un navigāciju, nodrošinot nevainojamu lietotāja pieredzi.
-
Pievienojiet sava zīmola logotipu, atjaunojiet sākumlapas banerus un pārliecinieties, ka veikals ir pilnībā optimizēts nevainojamai lietotāja pieredzei.
4. solis: Pievienojiet savus produktus
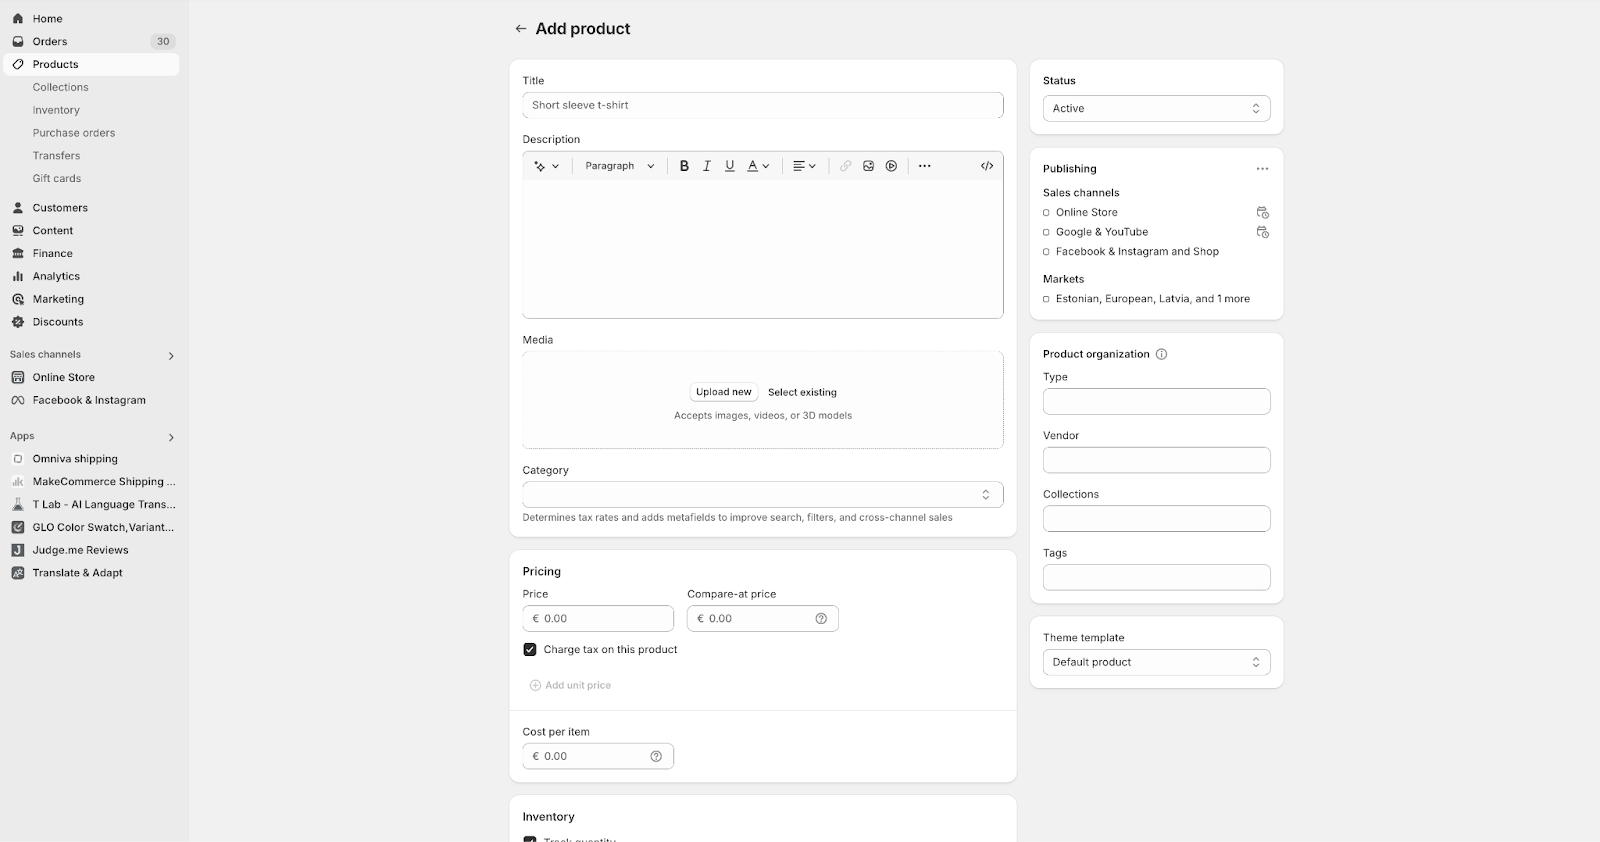
Pareizi pievienoti produkti uzlabo gan SEO klasifikāciju, gan reklāmguvumu rādītājus.
-
Dodieties uz Produkti > Pievienot produktu.
-
Aizpildiet šādu informāciju:
-
Produkta nosaukums — izmantojiet aprakstošus un atslēgvārdiem bagātus nosaukumus (piem. "Ar rokām darināts ādas maks vīriešiem").
-
Apraksts — izceliet funkcijas, priekšrocības un unikālos pārdošanas punktus.
-
Augstas kvalitātes attēli — pievienojiet produktu attēlus no dažādiem leņķiem, kā arī dzīvesstila kadrus.
-
Cenas — norādiet produktu cenas un atlaides.
-
Krājumu informācija — sekojiet līdzi krājumu daudzumam.
-
Piegāde – norādiet produkta svaru un pieejamās piegādes metodes.
-
Saglabājiet un atkārtojiet, lai pievienotu nākamos produktus.
5. solis: Uzstādiet maksājumu un piegādes iespējas
Iestatīt maksājumus
-
Atveriet sadaļu Iestatījumi > Maksājumi.
-
Iestatiet Shopify maksājumus vai integrējiet PayPal, Stripe, MakeCommerce u.c.
-
Ievadiet sava uzņēmuma un bankas informāciju.
-
Iestatiet vēlamo valūtu sadaļā Iestatījumi > Vispārīgi.
Iestatīt piegādi
-
Dodieties uz Iestatījumi > Sūtīšana un saņemšana.
-
Pievienojiet vienotās piegādes likmes, svarā balstītās likmes vai reāllaika tarifus no piegādes pakalpojumu sniedzējiem.
-
Piedāvājiet bezmaksas piegādi kā stimulu lielākiem pasūtījumiem. Lielisku efektu var panākt, piedāvājot arī vienu vidējas cenas piegādes iespēju un vienu augstākas klases variantu, piem. "Premium Express – piegāde vienas dienas laikā".
6. solis: Shopify SEO optimizācijas padomi
Lai iegūtu augstākas pozīcijas meklētājprogrammās, piemēram, Google vai Bing, izmantojiet šos SEO padomus:
-
Optimizējiet produktu nosaukumus un aprakstus, izmantojot atbilstošus atslēgvārdus.
-
Pievienojiet attēliem alternatīvo tekstu, lai nodrošinātu labāku meklēšanas redzamību.
-
Pielāgojiet URL, lai tie būtu īsi un ar piemērotiem atslēgvārdiem.
-
Nodrošiniet SSL sertifikātu drošībai un uzticamībai.
-
Izveidojiet XML vietnes karti, izmantojot Iestatījumi > Preferences.
7. solis: Iestatiet juridiskās lapas
Lai veidotu uzticību un ievērotu noteikumus, pievienojiet nepieciešamās juridiskās lapas:
-
Privātuma politika
-
Noteikumi
-
Atmaksas politika
-
Piegādes politika
Atveriet sadaļu Iestatījumi > Juridiskie pakalpojumi un izmantojiet Shopify veidnes vai pielāgojiet tās pēc vajadzības.
8. solis: Atveriet savu veikalu
Pirms veikala aktivizēšanas pārliecinieties, ka viss darbojas pareizi:
✔️ Pārbaudiet izrakstīšanās procesu.
✔️ Pārskatiet produktu aprakstus un attēlus.
✔️ Nodrošiniet mobilo ierīču atsaucību.
✔️ Apskatiet un uzlabojiet savu sākumlapu.
Kad esat gatavs, noņemiet paroli, dodoties uz Tiešsaistes veikals > Preferences, pēc tam noklikšķiniet uz “Aktivizēt mājaslapu”.
9. solis: Reklamējiet savu Shopify veikalu
Lai piesaistītu vairāk klientu, izmantojiet šīs pārbaudītās mārketinga stratēģijas:
-
SEO optimizācija — iegūstiet augstāku vietu Google meklētājā.
-
Sociālo mediju mārketings — reklamējiet Facebook, Instagram, Pinterest un TikTok.
-
E-pasta mārketings — sūtiet aicinājuma e-pastus, atgādinājumus par pamestiem groziem un personalizētus reklāmas piedāvājumus
-
Google reklāmas un Facebook reklāmas — palieliniet klientu plūsmu ar apmaksātām reklāmām.
-
Satura mārketings — rakstiet bloga ierakstus par savu nozari, lai piesaistītu dabisku klientu plūsmu.
Noslēgumā
Izveidot savu pirmo Shopify veikalu ir vienkārši un ātri ar šo soli pa solim ceļvedi. Shopify piedāvā visus nepieciešamos rīkus, lai uzsāktu savu e-komercijas ceļojumu un gūtu panākumus neatkarīgi no tā, vai pārdodat rokām darinātas preces, mājas dekorus, elektroniku vai digitālos produktus. Sāciet darbu jau šodien un izveidojiet savu sapņu online veikalu!